
Crisp winter air, evening snowfall, and hot cocoa—decorating the house for the holiday season is one of America's favorite winter traditions. But if you have ever spent freezing afternoons unraveling tangled wire webs only to end up with sagging rooflines, mismatched light tones, or tripped circuit breakers, you know how frustrating the process can be. Professional holiday lighting companies make every home look like a winter wonderland, but hiring a crew can easily cost anywhere from $500 to over $1,500 per season.
Fortunately, you do not need a professional installer budget to achieve that polished, magazine-worthy exterior display. By adopting a few clever techniques used by commercial crews, you can dramatically elevate your home's holiday curb appeal while keeping costs low and safety high. Here are 7 simple outdoor Christmas light hacks that will make your home the star of the neighborhood this season.
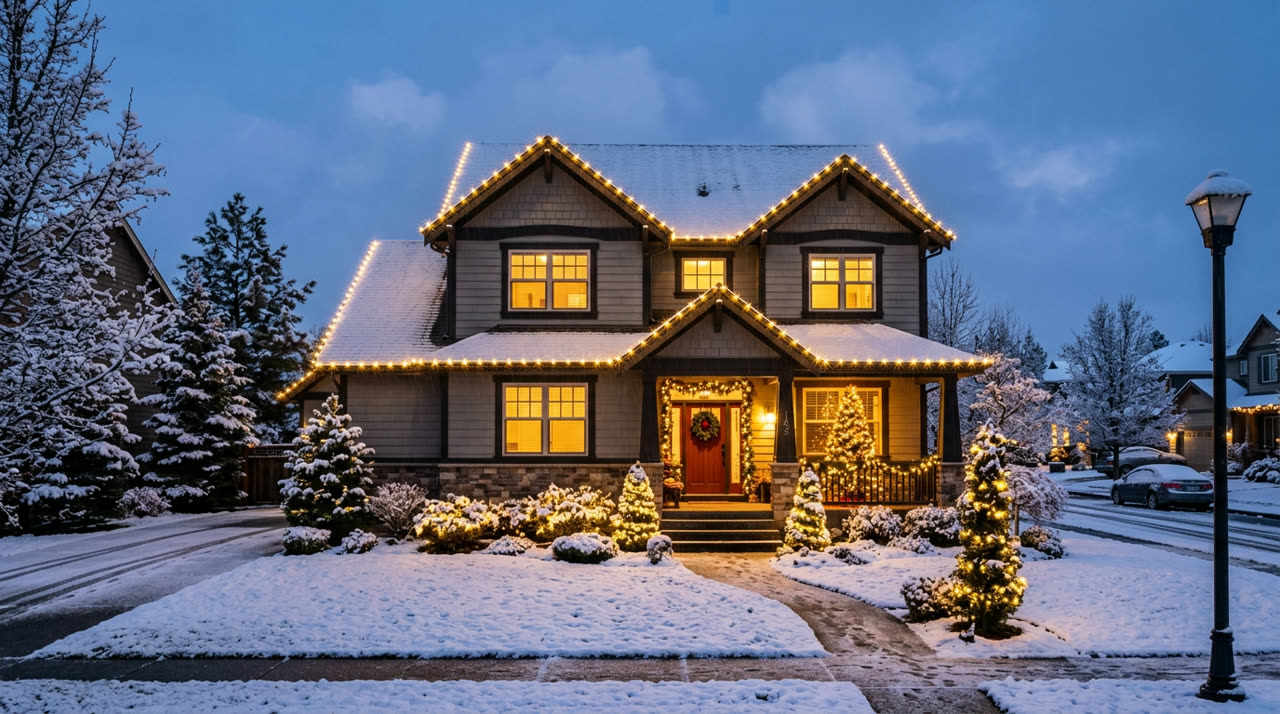
1. Standardize Your Color Temperature Across All Strands
One of the biggest mistakes homeowners make is mixing different shades of white lights. If you combine warm white (which has a yellowish, golden glow around 2700K) with cool white (which has a crisp, blue-ish undertone around 5000K), your display can look haphazard and chaotic rather than intentional.
Before hanging a single strand, check the light packaging for color specifications. For traditional architectural features like eaves, pillars, and porch railings, stick strictly to warm white for a classic, cozy aesthetic. If you prefer a crisp, modern frost theme, use cool white everywhere on the building structure. You can still use vibrant colors (reds, greens, or blues) on bushes and landscape accents, but keeping your primary structural lighting consistent is the secret foundation of professional design.
- Check existing strands: Test old lights against new ones outdoors at dusk to verify color matching.
- Group by Kelvin rating: Keep 2700K bulbs together on the house frame and save cool lights for icy lawn displays.
- Buy in bulk: Purchase lights from the same manufacturer batch to avoid subtle shade variations.
2. Ditch the Nails and Staples: Master All-In-One Light Clips
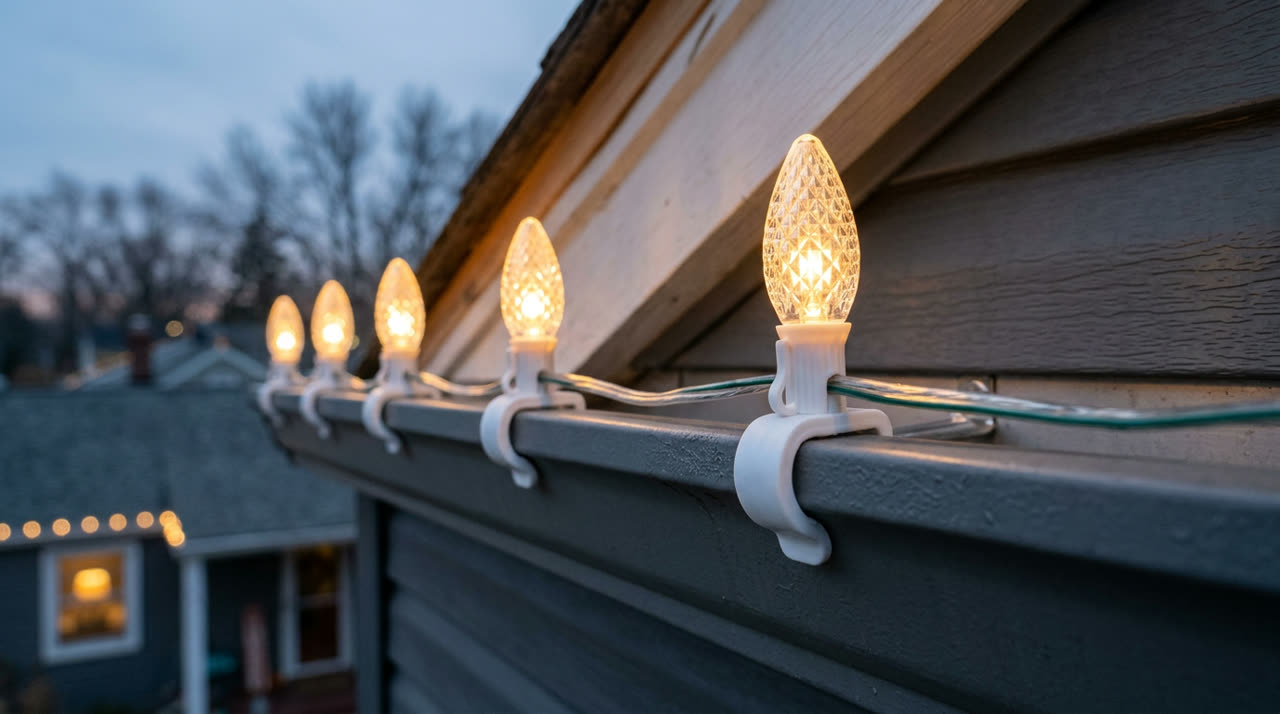
Hammering nails into fascia boards or using metal staples to secure wires is a recipe for long-term damage. Staples can pierce protective wire insulation—creating fire hazards—while nails leave holes that invite rot and water damage. More importantly, stapled strands rarely form straight lines, leading to uneven, droopy light displays.
Commercial installers rely exclusively on all-in-one plastic light clips (often labeled as omni clips, gutter clips, or shingle grips). These inexpensive plastic hardware clips snap directly onto your gutters or slide under roof shingles without causing damage. They hold C9, C6, or mini-bulbs firmly upright or pointing straight down, yielding those razor-sharp, laser-straight light lines along your roofline that scream professional craftsmanship.
- Orient bulbs uniformly: Point all bulbs in the exact same direction (e.g., straight down or standing upright).
- Space clips evenly: Place clips every 6 to 12 inches to prevent sagging between bulbs during heavy winds.
- Remove carefully: In January, unclip gently rather than yanking the string down to prevent clip breakage.
3. Automate Your Setup with Smart Plugs and Outdoor Timers
Nothing ruins the holiday spirit faster than bundling up in a blizzard late at night just to unplug outdoor extension cords. Mechanical dial timers work fine, but they often lose accurate timing during power blips and fail to adapt as sunset times shift throughout November and December.
Upgrade your setup with an outdoor smart plug rated for winter weather (IP64 or higher). Outdoor smart plugs allow you to set custom schedules directly from your smartphone, trigger displays based on exact local sunset times, or control lights with voice assistants like Alexa and Google Assistant. You can even set auto-shutoff timers for 11:00 PM to save on electric bills while ensuring your lights shine brightly during peak traffic hours.
- Use dusk-to-dawn automation: Set lights to turn on automatically at local sunset.
- Monitor wattage limits: Ensure your smart plug matches the total amperage of all connected strands.
- Group multiple zones: Assign porch lights, yard features, and rooflines to separate smart channels for customized scenes.
4. Wrap Tree Trunks First for a Sculpted 3D Landscape
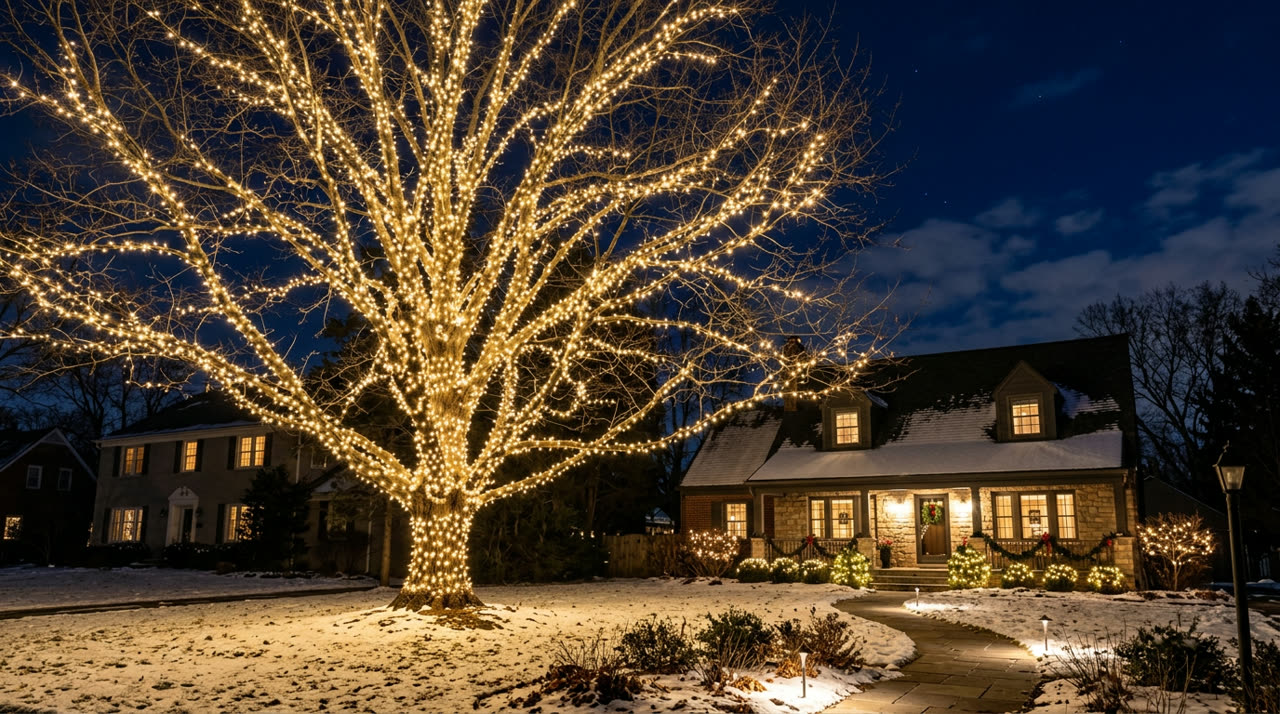
Drapery lights haphazardly over tree branches like a throw blanket creates an unstructured blob of light that disappears during daytime hours. Pro installers take a structural approach known as bark wrapping or trunk-to-branch tracing.
Start at the base of your tree trunk and wrap mini lights tightly around the bark, moving upward in a spiraling barber-pole pattern with roughly 2 to 3 inches between each turn. Continue up the main scaffold branches before winding back down. This technique highlights the natural architectural silhouette of bare winter trees, giving your front yard a dramatic, high-end resort feel.
- Use tight tension: Keep strands snug against the bark so wind won't shift or sag the spacing.
- Choose brown or green wire: Match wire color to the bark to hide cords during the day.
- Calculate strand length: Plan on roughly 100 feet of mini-lights for every 1.5 feet of trunk trunk diameter wrapped tightly.
5. Highlight Architectural Focal Points Before Filling Details
When planning your light layout, avoid throwing lights randomly around the yard. High-end lighting designs follow a clear hierarchy: they frame the house's architectural strength first before adding decorative yard accents.
Begin by mapping out your roof peaks, front entry dormers, main columns, and window frames. Using crisp C9 LED bulbs along main roof ridges instantly grounds the property's structure. Once your main architectural lines are clearly established, move outward to secondary elements like porch railings, walkway pathways, and front yard evergreen shrubs. This structured approach prevents visual clutter and makes small homes look significantly grander.
6. Weatherproof Electrical Connections Against Snow and Rain
Tripped GFCI outlets are the ultimate holiday buzzkill. When rain, melting snow, or morning condensation seeps into exposed extension cord connection points, your outdoor circuit breakers instantly shut off to prevent electrical shorts.
Professional installers use waterproof extension cord safety seals—plastic capsule enclosures with rubber gaskets that lock over cord plug connections. For a budget DIY alternative, wrap connection joints tightly with commercial-grade silicone electrical tape or store plugs inside inverted plastic electrical boxes elevated a few inches off damp soil using garden stakes.
- Keep plugs off the ground: Never let connection points rest directly in wet grass or mulch.
- Use GFCI outlets: Always plug outdoor lighting into ground-fault circuit interrupter outlets for safety.
- Seal unused female ends: Cover open electrical sockets at the end of light strands with electrical safety caps.
7. Use Net Lights and the "Z-Pattern" for Uniform Bush Coverage
Wrapping bushes in circular spirals buries light bulbs under heavy foliage while leaving large dark spots on display faces. For uniform coverage on trimmed hedges or boxwood shrubs, net lights offer an instant, perfectly spaced grid solution that drapes in seconds.
If you are using traditional string lights on irregular bushes, employ the Z-pattern technique. Start at the top left corner of the bush and weave the light strand horizontally across to the right, then drop down 6 inches and weave back to the left in a continuous zigzag pattern. Push every third or fourth bulb slightly deeper into the foliage to create rich optical depth and hide unsightly connecting wires.
Achieving a spectacular, head-turning outdoor holiday light display doesn't require engineering degrees or thousands of dollars in commercial contractor fees. By matching your color temperatures, securing clean lines with all-in-one clips, and strategically highlighting your home's architectural lines, you can create a cozy, professional holiday glow that welcomes family and neighbors all season long.
Be sure to test all your light strands on the ground before climbing ladders, work during daylight hours, and always prioritize ladder safety. Grab your measuring tape, stock up on plastic clips, and turn your home into the neighborhood highlight this winter!





0 Comments